
안녕하세요. 언제나 휴일입니다.
이전 글에서 C#으로 MSSQL과 연동하는 예광탄을 만들었습니다.
이번에는 예광탄에서 만든 기능을 WCF 서비스로 만들어 보기로 할게요. (무료 동영상 강의)
1. WCF 서비스 구현
먼저 관리자 권한으로 Visual Studio를 실행하세요.
그리고 WCF 프로젝트를 생성합니다.
1.1 IService.cs
IService는 서비스로 제공할 기능과 형식에 관한 계약을 정의합니다.
여기에서는 가입 요청, 로그인 요청, 로그아웃 요청, 탈퇴 요청 함수를 계약 표시합니다.
(예광탄에서 정의했던 함수를 참고하여 표시하세요.)
using System.ServiceModel;

// 참고: "리팩터링" 메뉴에서 "이름 바꾸기" 명령을 사용하여 코드 및 config 파일에서 인터페이스 이름  "IService"을 변경할 수 있습니다.
[ServiceContract]
public interface IService
{

	[OperationContract]
	bool RegReq(string id, string pw, string name);

	[OperationContract]
	string LoginReq(string id, string pw);

	[OperationContract]
	void LogoutReq(string id, string pw);

	[OperationContract]
	void UnregReq(string id, string pw);
}
1.2 Service.cs
IService에서 구현하기로 한 함수를 구현합니다.
각 기능에 코드는 예광탄에서 작성했던 코드입니다.
using System.Data;
using System.Data.SqlClient;

// 참고: "리팩터링" 메뉴에서 "이름 바꾸기" 명령을 사용하여 코드, svc 및 config 파일에서 클래스 이름  "Service"를 변경할 수 있습니다.
public class Service : IService
{
    string constr = "Data Source=DESKTOP-T87J0UT; Initial Catalog=eh; User ID=scott; Password=tiger;";
    public bool RegReq(string id, string pw, string name)
	{
        int re = 0;
        try
        {
            SqlConnection scon = new SqlConnection(constr);
            string text = string.Format("insert into EHMember(ID,PW,MNAME,Status) values('{0}','{1}','{2}',0);", id, pw, name);
            SqlCommand cmd = new SqlCommand(text, scon);
            scon.Open();
            re = cmd.ExecuteNonQuery();
            scon.Close();
        }
        catch { }
        return re == 1;
    }
    public string LoginReq(string id, string pw)
    {
        SqlParameter sp_id = new SqlParameter("@ID", id);
        SqlParameter sp_pw = new SqlParameter("@PW", pw);
        SqlParameter sp_name = new SqlParameter("@MName", SqlDbType.NVarChar, 50);
        sp_name.Direction = ParameterDirection.Output;
        sp_name.Value = "";
        SqlParameter sp_result = new SqlParameter("@Result", 0);
        sp_result.Direction = ParameterDirection.Output;
        try
        {
            SqlConnection scon = new SqlConnection(constr);
            string text = "LoginReq";
            SqlCommand cmd = new SqlCommand(text, scon);
            cmd.CommandType = CommandType.StoredProcedure;
            cmd.Parameters.Add(sp_id);
            cmd.Parameters.Add(sp_pw);
            cmd.Parameters.Add(sp_name);
            cmd.Parameters.Add(sp_result);
            scon.Open();
            cmd.ExecuteNonQuery();
            scon.Close();
        }
        catch { }
        return sp_name.Value.ToString();
    }
    public void LogoutReq(string id, string pw)
    {
        SqlParameter sp_id = new SqlParameter("@ID", id);
        SqlParameter sp_pw = new SqlParameter("@PW", pw);
        try
        {
            SqlConnection scon = new SqlConnection(constr);
            string text = "LogoutReq";
            SqlCommand cmd = new SqlCommand(text, scon);
            cmd.CommandType = CommandType.StoredProcedure;
            cmd.Parameters.Add(sp_id);
            cmd.Parameters.Add(sp_pw);
            scon.Open();
            cmd.ExecuteNonQuery();
            scon.Close();
        }
        catch { }
    }
    public void UnregReq(string id, string pw)
    {
        SqlParameter sp_id = new SqlParameter("@ID", id);
        SqlParameter sp_pw = new SqlParameter("@PW", pw);
        try
        {
            SqlConnection scon = new SqlConnection(constr);
            string text = "UnregReq";
            SqlCommand cmd = new SqlCommand(text, scon);
            cmd.CommandType = CommandType.StoredProcedure;
            cmd.Parameters.Add(sp_id);
            cmd.Parameters.Add(sp_pw);
            scon.Open();
            cmd.ExecuteNonQuery();
            scon.Close();
        }
        catch { }
    }
}
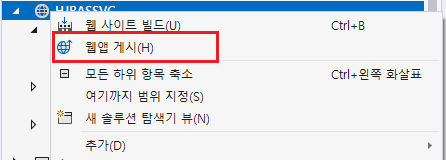
1.3 웹앱 게시
솔루션 창에서 프로젝트의 컨텍스트 메뉴(오른쪽 마우스 버튼 클릭 시 나오는 메뉴)에서 웹앱 게시를 선택합니다.
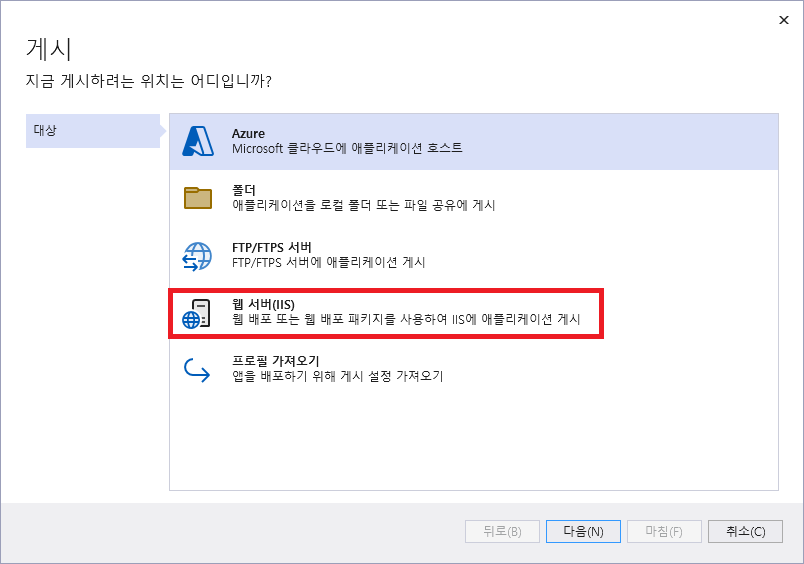
게시 위치를 웹 서버(IIS)로 선택하여 다음 버튼을 클릭합니다.
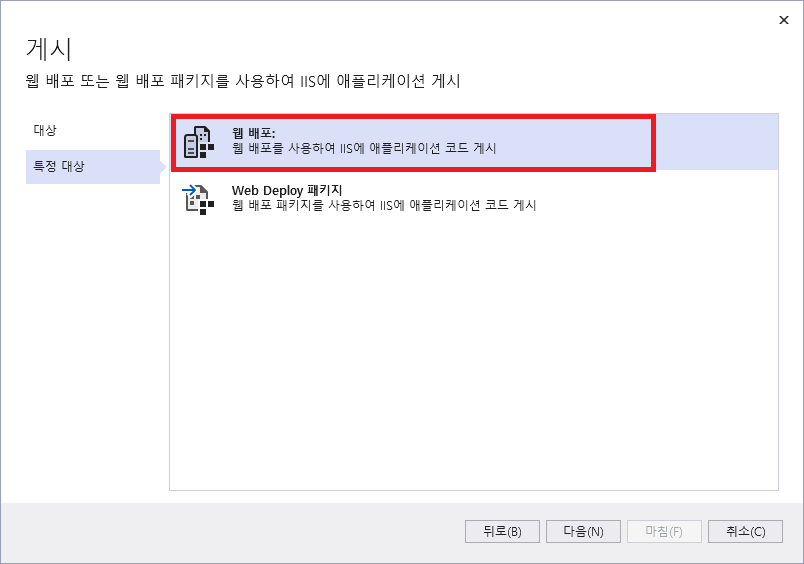
특정 대상에서 웹 배포를 선택하여 다음을 선택합니다.
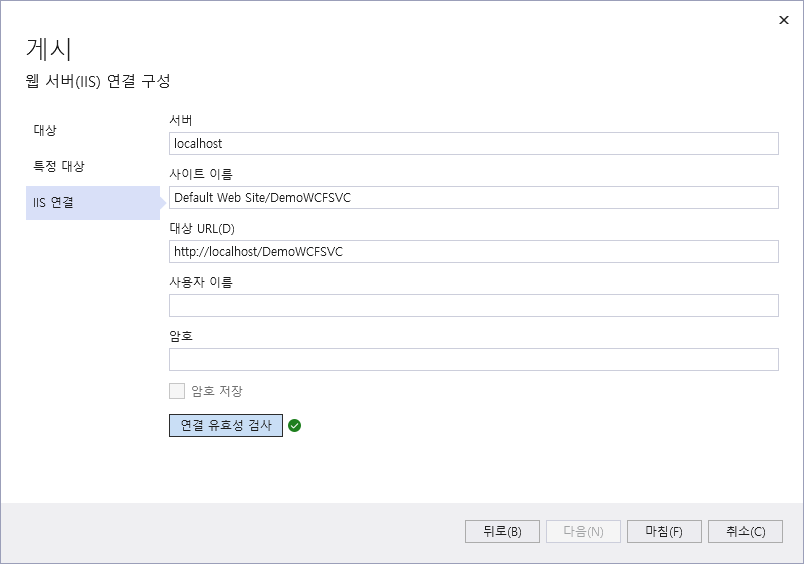
웹 서버(IIS) 연결 구성에 서버, 사이트 이름, 대상 URL을 입력한 후에 연결 유효성을 검사한 후 마침을 누르세요.
서버 이름은 localhost 혹은 IP 주소를 입력합니다.
사이트 이름은 Default Web Sitet/가상 디렉토리 이름을 입력합니다.
대상 URL은 http://localhost/가상 디렉토리 이름을 입력합니다.(localhost 대신 IP 주소를 입력해도 괜찮습니다.)
연결 유효성 검사가 정상적이면 마침을 누르세요.
2. 서비스 테스트
WCF 서비스가 잘 동작하는지 테스트하기로 할게요.
여기에서는 C# 콘솔 앱(.NET Framework) 프로젝트로 예광탄2를 만들어서 테스트 할게요.
2.1 서비스 참조 추가
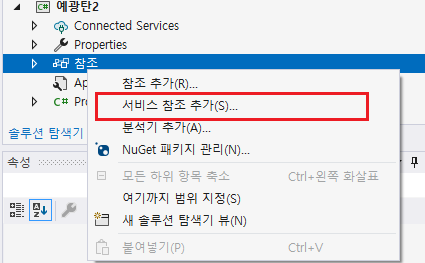
프로젝트의 참조에서 컨텍스트 메뉴를 띄운 후에 서비스 참조 추가를 선택합니다.
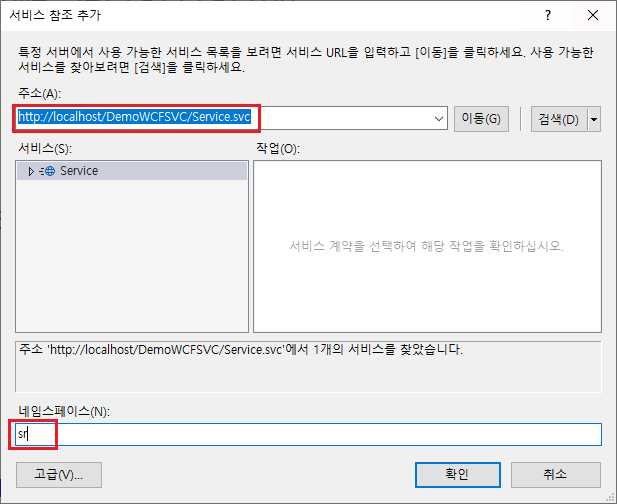
서비스 참조 추가 창에서 참조할 서비스 주소 입력 후 이동 버튼을 클릭한 후 네임스페이스를 정하여 확인을 누르세요.
ServiceClient 개체를 생성한 후에 서비스에서 제공하는 함수를 호출해 봅니다.
다음은 회원 가입 요청을 수행하는 예제 코드입니다.
using System;

namespace 예광탄2
{
    internal class Program
    {
        static void Main(string[] args)
        {
            sr.ServiceClient sc = new sr.ServiceClient();
            Console.WriteLine(sc.RegReq("kkc", "yashoo","강감찬"));
            sc.Close();
        }
    }
}
이 외에 WCF 서비스를 통해 로그인, 로그아웃, 탈퇴 기능을 사용할 수 있는지 테스트 해 보세요.